Set up Okta Verify on iOS devices
Okta Verify is an app that helps protect your data, ensuring that only you can access your app accounts.
Okta Verify features are available based on configurations made by your organization.
When you access apps protected by Okta, you select a security method to confirm your identity. If your organization uses Okta Verify, you can select any of these security methods as long as it was configured by your admin:
- A push notification sent to your device
- A temporary six-digit code
- Okta FastPass
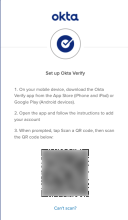
To set up Okta Verify on your iOS device for the first time, go to your computer and open your organization’s Welcome or Multifactor Authentication (MFA) activation email. Click the sign-in URL to access your organization's Okta End-User Dashboard. Follow the instructions to obtain a QR code. Then, download and install Okta Verify on your device, and scan the QR code displayed on the computer. You can also set up Okta Verify without a QR code.
Before you begin
- Check and confirm that you are using the correct software versions. See Supported platforms, browsers, and operating systems.
- Check if QR code scanning is enabled on your device.
- Go to Settings and scroll down to Camera.
- Tap Camera.
- Find Scan QR Codes and make sure it's enabled (the switch is green).
A QR code is a universal barcode that your device's camera can scan and read. Okta uses QR codes to easily register your device with your Okta account, as shown in the following example.
- Open the Welcome or MFA activation email from your administrator. This email includes a link to your organization’s sign-in URL and your username (typically, it’s your email address). You need this information to set up your Okta Verify account. If you didn’t receive an email with instructions, contact your help desk.

Choose your task
- Set up Okta Verify on your iOS device by using a QR code
- Set up Okta Verify on your iOS device by signing in to your apps dashboard
- Set up Okta Verify on your iOS device by using an activation link or secret key
- Restore Okta Verify on the same iOS device
- Add your Okta Verify account on a new iOS device from the Dashboard settings page