Restore Okta Verify on the same iOS device
If you reset your device, deleted Okta Verify, or deleted your account from the app, you might be able to restore your Okta Verify account so that you can authenticate with the app again. However, it might not be enough to just install the app again. You might have to first remove your existing Okta Verify enrollment from the Settings page on your organization’s Okta End-User Dashboard. Some restrictions apply.
This topic is for users who already had an Okta Verify account on the device. If you’re a new user and have not yet set up Okta Verify, see Set up Okta Verify on iOS devices.
Okta Verify features are available based on configurations made by your organization.
Before you begin
To restore Okta Verify on your device, you must be able to access the Okta End-User Dashboard using a security method other than Okta Verify, such as SMS (text), email, or Security Key or Biometric Authenticator (among others). See Sign in to resources protected by Okta.
If you’re unsure whether you set up additional security methods, enter the sign-in URL in your internet browser and enter your username and password. Based on your organization’s configuration, one of these sign-in windows might appear.
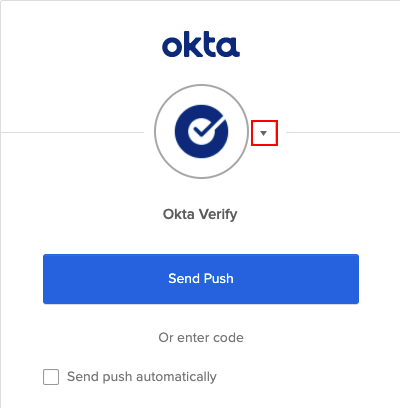
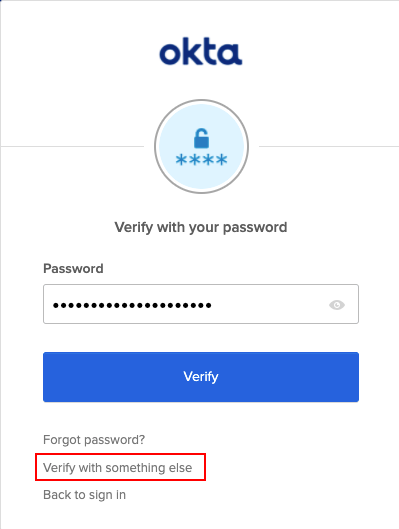
Click the arrow beside the Okta Verify factor or Verify with something else to see what other sign-in methods are available.
If you don’t have any other security methods set up and can't access your company's Okta End-User Dashboard, contact your company’s help desk. Some organizations configure user access so that you can have only one device set up with Okta Verify at a time.
Start this procedure
- Task 1. In a browser, remove Okta Verify from your account settings.
- Task 2. Install Okta Verify and add your account.
Task 1. In a browser, remove Okta Verify from your account settings.
- From a browser, sign in to your organization's Okta End-User Dashboard. If you can't sign in, contact your company’s help desk.
- Click the arrow next to your name and go to Settings.
- If the Edit Profile button appears, click it and enter your password if prompted.
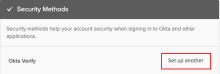
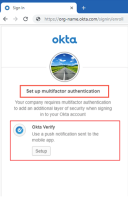
- Get a new QR code. Scroll down to Extra Verification. In some organizations, this section is called Security Methods.
The Extra Verification or Security Methods section appears only if your organization configured this option. For details, contact your company’s help desk.
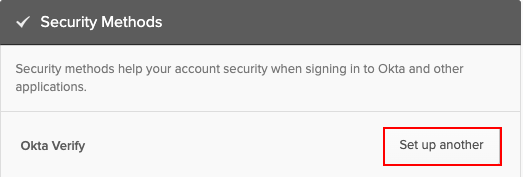
- If Okta Verify is in the Security methods section, follow these steps:
- Click Set up another.
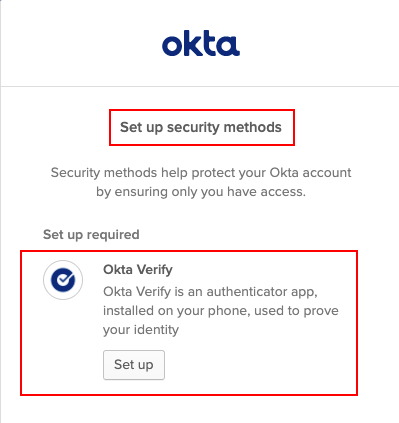
- Confirm your identity as prompted.
Click Set up to confirm that you’re setting up Okta Verify.

The Okta Verify enrollment QR code appears on the screen.
- Click Set up another.
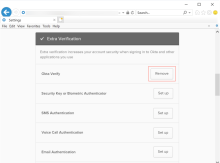
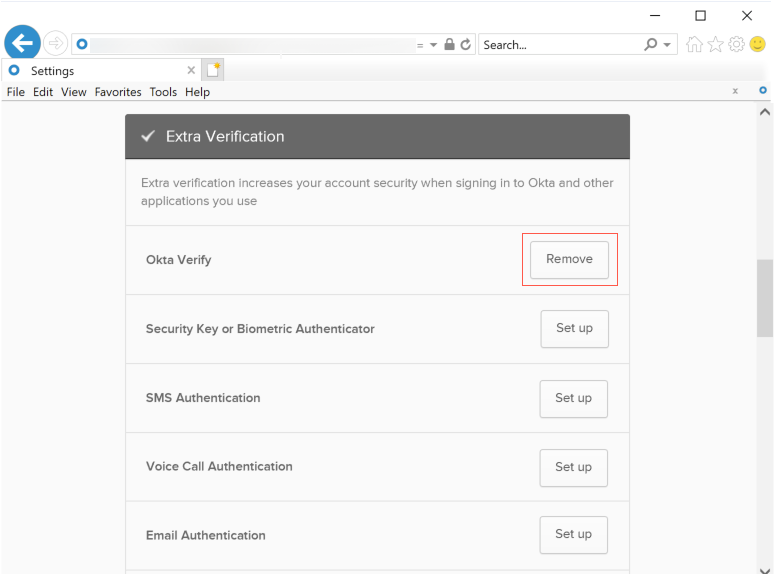
- If Okta Verify is in the Extra Verification section, follow these steps:
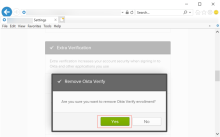
- Click Remove.
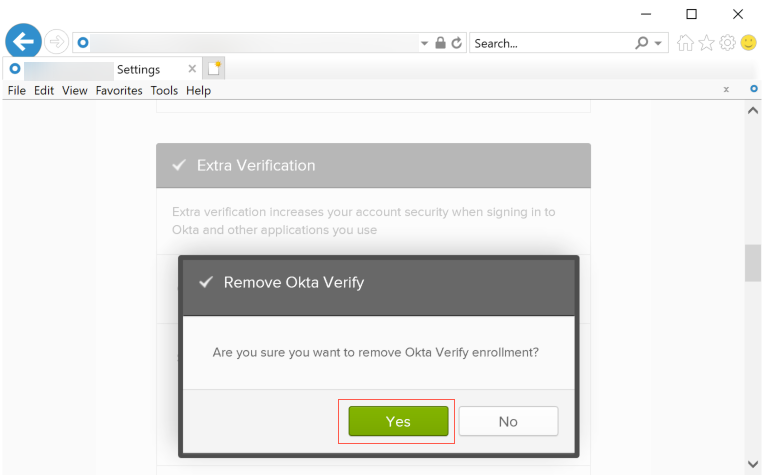
- When prompted to confirm removal, click Yes.
- Follow the instructions on the screen. You might have to confirm your identity with a security method.
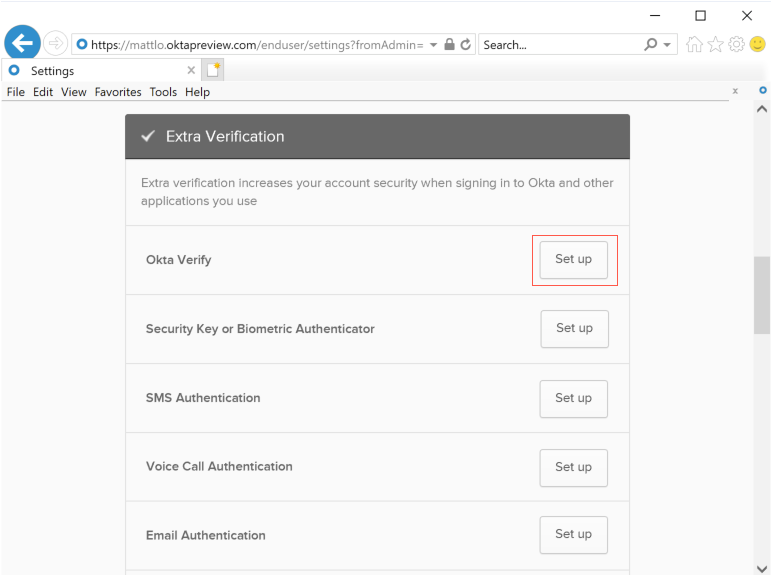
- In the Okta Verify row, click Set up.

- Click Set up to confirm that you want to set up Okta Verify again.
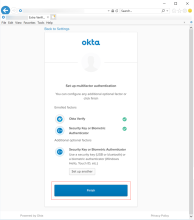
- Select your device type and click Next.
The Okta Verify enrollment QR code appears on the screen.
- Click Remove.
- If Okta Verify is in the Security methods section, follow these steps:

Task 2. Install Okta Verify and add your account.
- Go to your device. If you don’t have Okta Verify, download it from the Apple App Store and install it.
- Open the app to add your account again.
- If you just installed Okta Verify, tap Add account.
-
If you already had Okta Verify on your device, tap Add (+).
- Choose the type of account to add. Tap Organization.
- Choose your account setup method.
- Ensure the code is shown on another device such as a laptop or desktop. Tap Yes, Ready To Scan, and point your camera at the QR code displayed in the browser on another device.
- If you don’t know how to obtain the QR code, tap Where do I get my QR code?
- If you can’t scan the QR code, tap No, Sign In Instead. Follow the instructions in Set up Okta Verify on your iOS device by signing in to your apps dashboard.
- If prompted, allow push notifications on your device so that you can approve future sign-in notifications without opening the Okta Verify app.
- If prompted, enable Face ID or Touch ID. Tap Enable. A message confirms that your account was added.
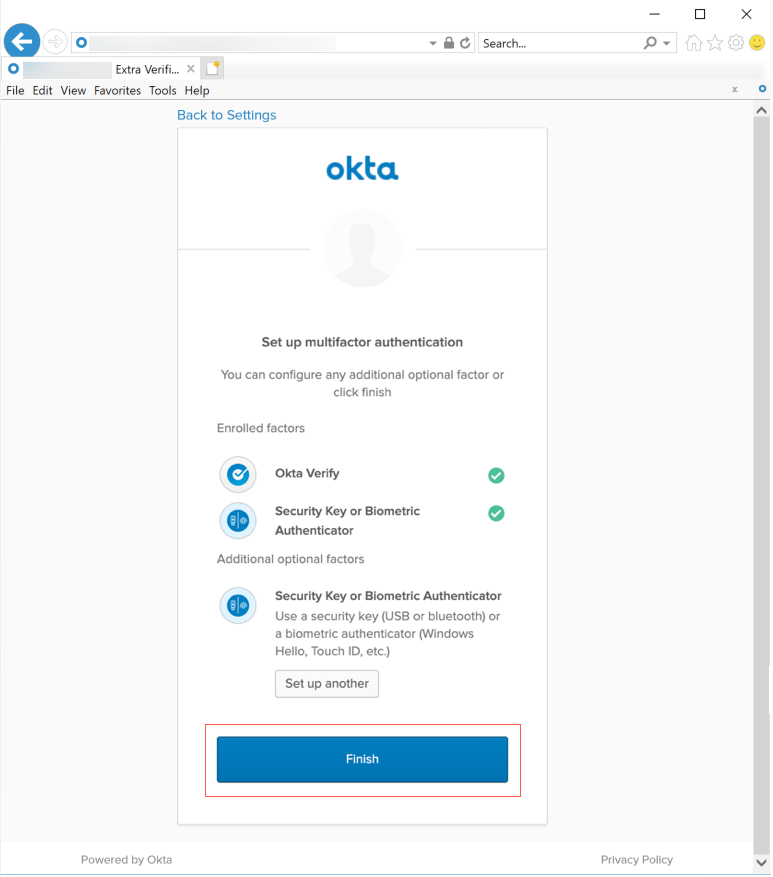
- If the following screen appears on your browser, click Finish. (This screen appears only in some cases).
- Tap Done to complete the account enrollment. Your new account is now available in the Okta Verify app.

You can use Okta Verify to sign in to your organization's apps protected by Okta.