Set up Okta Verify on your iOS device by using a QR code
To set up Okta Verify on your iOS device for the first time, go to your computer and sign in to your organization’s Okta End-User Dashboard. Follow the instructions to obtain a QR code. Then download and install Okta Verify on your device, and scan the QR code displayed on the computer.
Okta Verify features are available based on configurations made by your organization.
Before you begin
- Check and confirm that you meet all the prerequisites. See Set up Okta Verify on iOS devices.
- Find the Welcome or MFA activation email from your technology department. This email includes a link to your organization’s sign-in URL and your username (typically, it’s your email address). You need this information to set up your Okta Verify account. If you didn’t receive an email with instructions, contact your help desk.
- Important: Based on your organization's setup, you might not be able to enroll more than one device at a time in Okta Verify. If you get a message about this restriction, you must first remove your existing Okta Verify account from the Settings page. Sign in to the Okta End-User Dashboard, click the arrow next to your username, and go to Settings. Go to Extra Verification or Security Methods and remove your existing Okta Verify account. If you need help, contact your organization’s help desk.
Start this task
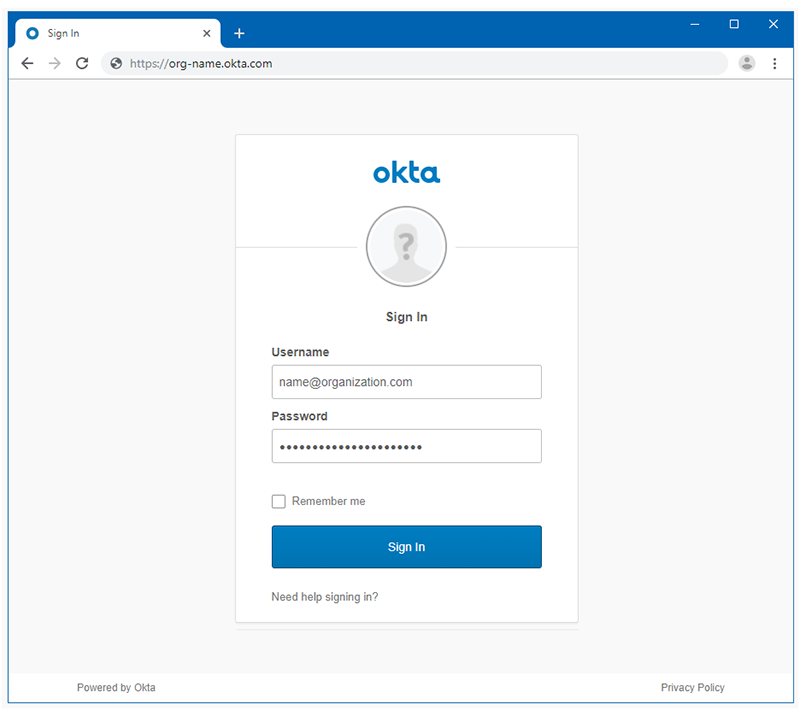
- Start on your computer. Open your Welcome email in a web browser and click your organization's sign-in URL. If you don't know your sign-in URL, contact your help desk.
- Enter your username (email address) and password and click Sign In.

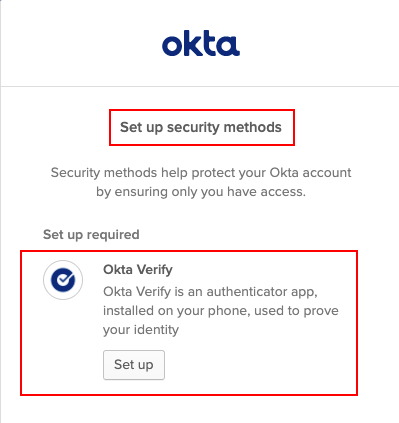
If your organization requires Okta Verify, you are prompted to set it up. Based on what your organization configured, one of these windows opens: Set up multifactor authentication or Set up security methods.
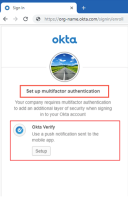

- Click Set up.
- Select iPhone as your device type and click Next.
- On your device, download Okta Verify from the Apple App Store – Okta Verify and install it.
- Open Okta Verify and follow the instructions.
- Tap Add Account.
- Choose the type of account to add. Tap Organization.
- Organization: Add a multifactor authentication (MFA) account for your work, school, or business that uses Okta as an authentication provider.
- Other: Use Okta Verify to generate one-time passwords for your personal account such as a bank or brokerage account.
- Choose your account setup method.
- Ensure the code is shown on another device such as a laptop or desktop. Tap Yes, Ready To Scan, and point your camera at the QR code displayed in the browser on another device.
- If you don’t know how to obtain the QR code, tap Where do I get my QR code?
- If you can’t scan the QR code, tap No, Sign In Instead. Follow the instructions in Set up Okta Verify on your iOS device by signing in to your apps dashboard.
- If prompted, allow push notifications on your device so that you can approve future sign-in notifications without opening the Okta Verify app.
- If prompted, enable Face ID or Touch ID. Tap Enable.
- Tap Done to complete the account enrollment.

Your new account is now available in the Okta Verify app.