Set up Okta Verify on your Android device by using an activation link or secret key
If you can't scan QR codes with your device, you can set up Okta Verify by using an activation link sent to your email or to the short message service (SMS) app on your device. You can also activate Okta Verify by using a secret key.
Okta Verify features are available based on configurations made by your organization.
Before you begin
- Check and confirm that you are using the right software versions. See Supported platforms, browsers, and operating systems.
- In some organizations, you can set up your Okta Verify account by signing in to your organization’s apps dashboard on a mobile device. For details, see Set up Okta Verify on your Android device by signing in to your apps dashboard.
- Find the Welcome or MFA activation email from your technology department. This email includes a link to your organization’s sign-in URL and your username (typically, it’s your email address). You need this information to set up your Okta Verify account. If you didn’t receive an email with instructions, contact your help desk.
-
After setting up Okta Verify with a secret key, you can't authenticate with a push notification. Instead, you must use a six-digit code generated by Okta Verify to sign in to your app accounts.
Start this task
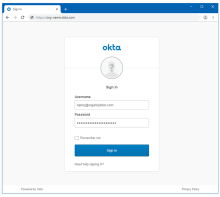
- Start on your computer. Open your Welcome email in a web browser and click your organization's sign-in URL. If you don't know your sign-in URL, contact your company’s help desk.
- Enter your username (email address) and password and click Sign In.
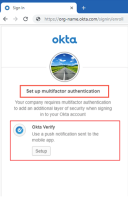
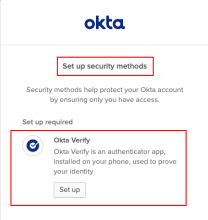
Based on what your organization configured, you are prompted to Set up multifactor authentication or Set up security methods.
- Click Set up.
- Select Android as your device type and click Next.
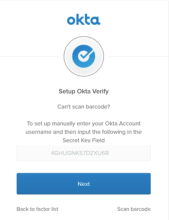
- Click the Can't scan? link under the QR code.
Depending on how your organization configured your account, you can either enroll in Okta Verify by using an activation link sent to your email or messaging app on your device or manually, by using a secret key.
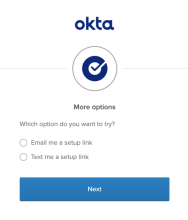
- Depending on which version appears in your browser, choose an option and click Next:
- Email me a setup link: If you select this option, you receive an activation link in an email. Enter your email address when prompted, and click Send me the setup link.

If you set up Okta Verify with a link sent to your email, ensure that you use your primary email (the address where you received the Okta Verify setup instructions from your organization). Using any other email address generates an error.
- Text me a setup link: If you select this option, you receive an activation link in a text message on your phone. Select your country and enter your phone number when prompted. Then, click Send me the setup link.
- Set up manually without push notification If you select this option, make note of the Secret Key. You will need it later in the Okta Verify app on your device. After choosing this option, you can't authenticate by using push notifications. You can authenticate only by using a code generated by Okta Verify.
- Email me a setup link: If you select this option, you receive an activation link in an email. Enter your email address when prompted, and click Send me the setup link.
- On your device, download Okta Verify from the Google Play Store – Okta Verify and install it.
- Activate your account.
- If you chose Email me a setup link, check the email app on your device, and tap Activate Okta Verify Push. Okta Verify opens and a message confirms your successful account activation.
- If you choose Text me a setup link, check the text messages app on your device, and tap the enrollment link. Okta Verify opens and a message confirms your successful account activation.
- If you chose Set up manually without push notification, open Okta Verify and follow the instructions.
- Tap Add Account and choose the account to add. Tap Organization.
- Organization: Add a multifactor authentication (MFA) account for your work, school, or business that uses Okta as an authentication provider.
- Other: Use Okta Verify to generate one-time passwords for your personal account such as a bank or brokerage account.
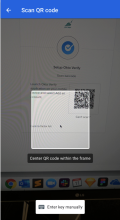
- Tap Yes, ready to scan.
- Tap Enter key manually.
- Enter your credentials on the Enter Key screen. Then, tap Add Account.
- Account Name: Enter the username that you received in the Welcome email.
- Key: Enter the key that was shown on your computer. See Step 6.
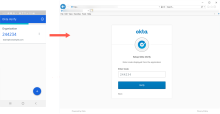
- On the Enter code displayed from the application page in your browser, enter the number that appears under your account in Okta Verify on your device.
- Click Verify. Your device is now enrolled.
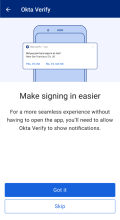
- If you install Okta Verify on Android 13, ensure that you allow Okta Verify to show notifications. Tap Got it if you if this page appears.
- Tap Add Account and choose the account to add. Tap Organization.
You can start using Okta Verify to authenticate when you sign in to your organization's applications protected by Okta.

