Add an account to Okta Verify by accessing an Okta-protected app on macOS devices
On macOS devices, you can add an account to Okta Verify by accessing an app on the Okta End-User Dashboard.
Note for administrators: Okta Verify for macOS is only available on Okta Identity Engine.
Okta Verify features are available based on configurations made by your organization.
Before you begin
- Confirm that you are using the correct software versions. See Supported platforms, browsers, and operating systems.
- If your IT department did not install Okta Verify on your macOS device for you, download Okta Verify from the Apple App Store, and then install it.
- Open the Okta Welcome/Activation email from your organization. This email includes a link to Your organization's sign-in page and Your username (typically, it's your email address). You need this information to set up your account. If you didn't receive the email, contact your company’s Help desk.
Follow these guidelines before you add an account to Okta Verify on a second desktop device:
- To enroll in Okta Verify on multiple desktop devices, you must enroll with an additional authentication factor (for example, Yubikey, SMS, or Okta Verify with Push), which you can use to sign in on the additional desktop devices.
- If your first Okta Verify enrollment is on a desktop device, your next Okta Verify enrollment can only be on a mobile device. Open your organization’s Okta account on your desktop, go to Okta Verify, click Set up, and then select your device type. A QR code appears on the screen. From your mobile device, scan the QR code to enroll.
If you try to set up Okta Verify on a second desktop device without following the above guidelines, you will be prompted repeatedly to enroll using Okta Verify, which is not possible in this circumstance.
Start this task
- Complete one of the following:
- In the Okta End-User Dashboard, click an app.
- In the Okta End-User Dashboard, right-click an app and select Copy Link Address, and then paste the URL in a browser.
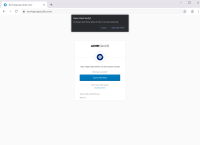
- Click Sign in with Okta FastPass .
- In the Open Okta Verify? pop-up, click Open Okta Verify.
- As applicable, complete one of the following:
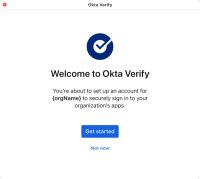
- If this is your first account with Okta Verify:
- Click Get started.
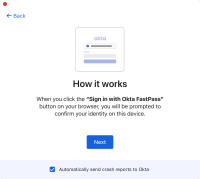
- Clear the Automatically send crash reports to Okta checkbox to prevent diagnostic information from being shared with Okta. You can change this setting at any time.
- Click Next.
See Share diagnostic information with Okta from your macOS device.
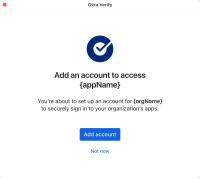
- If this is not your first account with Okta Verify, click Add account.
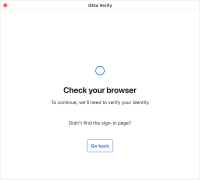
The Check your browser screen appears.
- If this is your first account with Okta Verify:
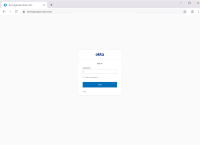
- In the new tab that opened, enter your Username.
- Click Next.
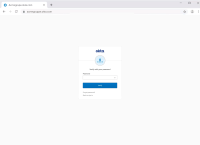
- Enter your Password.
- Click Verify.
- Close the browser tab.
- As applicable, complete one of the following:
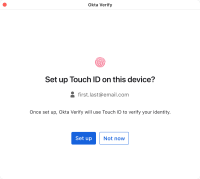
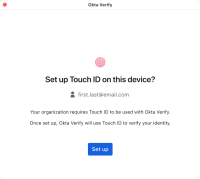
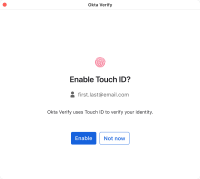
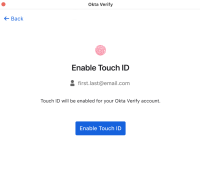
If your device supports Touch ID and your organization gives you the option of using it: click Set up, and then place a finger on the Touch ID sensor when prompted to set up Touch ID; or, click Not now, to set it up later.
If your device supports Touch ID and your organization requires it, click Set up, and then place a finger on the Touch ID sensor when prompted to set up Touch ID.
If your device does not support Touch ID and your organization requires it, click Got it. You will not be able to add an account. Contact your admin.
- As applicable, complete one of the following:
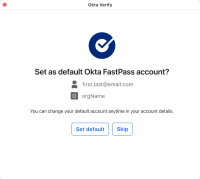
- If this is not your first Okta Verify account, click Set default to set this account as your default Okta FastPass account, or click Skip. You can go to your Account details screen at any time to make changes to the default Okta FastPass account.
A Your identity has been verified message displays.
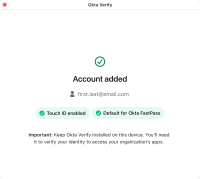
The Account added screen appears temporarily to inform you that your account was successfully added to Okta Verify. It also indicates if you enabled Touch ID for the account or if you set the account as your default account for Okta FastPass.
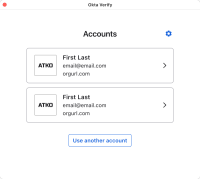
The Accounts screen appears. It lists all the accounts that are set up in your Okta Verify app.

