Deploy OVA to VMware vSphere/ESXi
Topics
To Deploy the Access Gateway OVA VMware vSphere/ESXI
VMWare ESXi, vSphere, and vSphere Client version 6.5 and later support SHA-256OVF files.
To convert from SHA256 to SHA1:
$ ovftool --shaAlgorithm=SHA1 /path/to/the/original/ova_file.ova /path/to/the/new/ova/file-SHA1.ova
-
Download and install VMware vSphere Client from the ESXi/vSphere server.
-
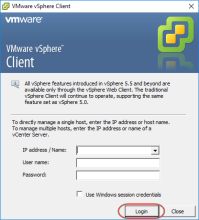
Open VMware vSphere Client.
-
Enter the server name or IP address and credentials in their respective fields and click Login.
-
In the vSphere Client window, select .
-
In the Deploy OVF Template window, click Browse.
-
Select the Okta-Access Gateway OVA file, and click Open.

-
Click Next.
-
Review the template details provided, and click Next.
-
When prompted to accept the Access Gateway License agreement, click Accept and then click Next.
-
Enter a name for the Access Gateway template and click Next.
-
Select a storage location and click Next.
-
Select the appropriate disk format option based on your requirements and click Next.
-
Click Finish. vSphere Client begins the deployment process.
-
Click Close when the deployment is complete.
-
In the vSphere Client window, click Inventory.
-
Select the Virtual Machines tab to display the VMs that are currently deployed to the server.
-
Select the Access Gateway VM and click Power On (symbolized by a play icon) in the toolbar.
-
Right-click the VM and click Open Console to sign in to the VM.

Troubleshooting compatibility errors
On some versions of VMware EXSi, theAccess Gateway appliance doesn't start due to a compatibility error.
To correct the error:
-
Open VMware vSphere Client.
-
Enter the server name or IP address and credentials in the respective fields, and click Login.
-
Navigate to the Okta Access Gateway VM.
- Right-click the VM name and select Compatibility > Upgrade VM compatibility > Yes.
- In the Compatible with dialog box, select the default ( typically ESXi 6.5 and later).
- The VM should start normally.
