Configure Face ID or Touch ID in your Okta Verify account on iOS devices
In some organizations, you can set up Face ID or Touch ID in Okta Verify as an additional way to confirm your identity when you sign in to apps protected by Okta.
Okta Verify features are available based on configurations made by your organization.
Tasks
Enable Face ID or Touch ID
Note for administrators: This feature is only available on Okta Identity Engine.
If you didn’t enable Face ID or Touch ID during the Okta Verify account setup, you might be prompted to do so later.
If you change the Face ID or Touch ID settings on your device, you go out of sync with the Okta Verify settings. If prompted, sync or enable Face ID or Touch ID.
- Open Okta Verify and tap your account.
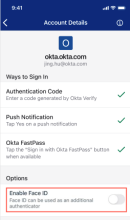
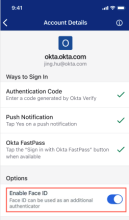
- On the Account Details page, go to the Options section and turn on Face ID or Touch ID.
- If prompted, go to your device Settings to configure Face ID or Touch ID. Then, return to Okta Verify to set up this type of verification in the app.
- If prompted, confirm your identity. Tap Sign in.
- Enter your organization's email address. This is the email where you received the setup instructions from your technology department.
The Setup Complete screen indicates what authentication methods were enabled.
- Tap Done. The Face ID or Touch ID toggle is now on.
Disable Face ID or Touch ID
Note for administrators: This feature is only available on Okta Identity Engine.
If Face ID or Touch ID is mandatory in your organization, you can’t disable it.
- Open Okta Verify and tap your account.
- On the Account Details page, go to the Options section and turn off Face ID or Touch ID.
- When prompted, confirm your identity by scanning your fingerprint or face.
Face ID or Touch ID is now disabled.


